How to Use a Screen Printing Tension Meter (And the Numbers That Matter)
Screen tension in plain numbers: where to measure, what 25 N/cm actually means, when a screen is too loose to print with, and how to pick a tension meter that lasts.
If you only take one number from this guide, take this one: 25 N/cm. That’s the working target most garment shops aim for on a freshly stretched screen, and it’s the number your tension meter exists to confirm. Below 18 N/cm, print problems start showing up that look like everything except a loose screen. Below 10 N/cm, the screen is done — no amount of press adjustment will save it.
A tension meter is a $150–600 tool that answers one question: is this screen still tight enough to print with? This guide is how to get a trustworthy answer out of it — where to put it on the screen, what the numbers mean, and when to stop fighting a screen and retire it.
What Screen Tension Actually Is (And Why It Runs Your Print Quality)
Mesh is a woven fabric held in the frame under stretch, like a drumhead. Tension is how hard that drumhead is pulled, measured in newtons per centimeter (N/cm) — how much force each centimeter of mesh width is under.
Why does the number matter so much? Because printing depends on snap-off: when the squeegee passes, the mesh has to peel cleanly off the ink and garment behind it. A tight screen snaps back fast and straight — ink stays where the stencil put it, dots stay round, edges stay sharp. A loose screen lags, smears, and releases late — and you get blurred edges, sawtoothing on diagonal lines, ghost images on fine detail, and registration that drifts between colors even though your press is perfectly aligned.
The traps that make tension a silent killer:
- Tension dies slowly. Every screen loses tension from the day it’s stretched — fastest in the first days, then gradually with use, cleaning chemicals, and heat. The decline is invisible. You only see its symptoms, weeks later, on the shirt.
- The symptoms impersonate other problems. Sawtoothing gets blamed on mesh count. Registration drift gets blamed on the press. Pale, uneven solids get blamed on the ink. Shops burn hours adjusting everything except the one number a tension meter reads in ten seconds.
- Screens in the same job must match. Multi-color work needs all screens within about 2 N/cm of each other — a tight screen and a loose screen lay ink at different effective positions, and no registration marks will fix that.
How to Use a Tension Meter: The 9-Point Method
The measurement itself takes under a minute. Doing it right is a procedure:
- Zero or check the meter on its calibration glass (every decent meter ships with one). Do this first, every session — a meter that reads 2 N/cm off is worse than no meter.
- Lay the screen flat, print side up, on a clean bench. Don’t measure with the screen leaning against a wall — gravity and frame flex will lie to you.
- Place the meter gently onto the mesh. These are deflection instruments: they push a small probe into the fabric and read how much the mesh resists. Dropping or pressing the meter adds force that isn’t tension.
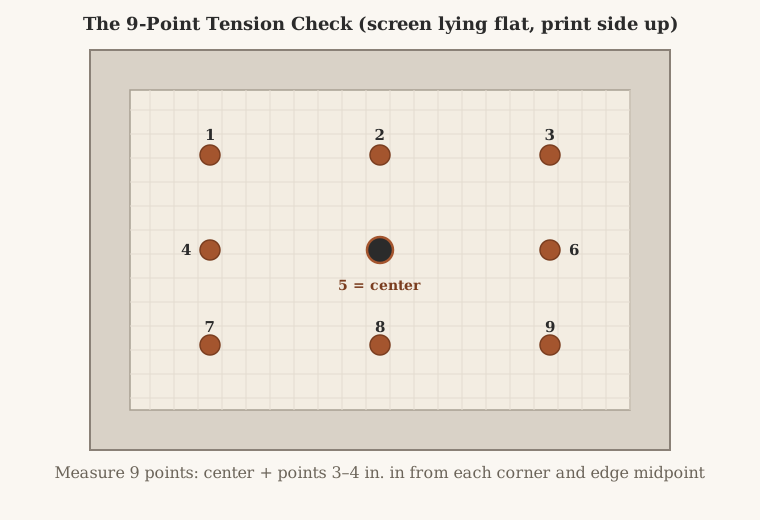
- Measure nine points: the center, plus points at roughly 3–4 inches in from each corner and each edge midpoint. One reading tells you almost nothing — mesh tension varies across the frame, always lowest near the corners, and a single soft quadrant is enough to ruin registration on that side of the print.
- Write the readings on the frame with a paint marker, plus the date. A screen is a consumable with a service life, and the tension log is its maintenance record.
When to measure
Three moments, non-negotiable:
- Right after stretching or receiving a new screen. Record the starting number. If your supplier or your own stretching can’t hit the target, everything downstream is compromised from day one.
- Before a multi-color job goes on press. Sixty seconds per screen, all screens in the set. This single habit eliminates the most miserable class of registration problems.
- On a schedule — monthly for working screens. You’re watching the slope: how fast this screen is dying.
Reading the Numbers: What’s Good, What’s Tired, What’s Dead
| Reading (N/cm) | Verdict | What to do |
|---|---|---|
| 25+ | Fresh, ideal for everything including halftones | |
| 20–25 | Normal working range for garment printing | |
| 15–20 | Tired. Fine lines, halftones, and tight registration will suffer | Reserve for simple one-color bold work |
| 10–15 | Retired territory. Expect sawtoothing, drift, uneven solids | Re-stretch or demote to test screens |
| Below 10 | Dead | Re-stretch or recycle the frame |
Two important footnotes the product pages won’t tell you:
- The target depends on the mesh. Fine mesh (230 and up) is woven from thinner thread and can’t safely hold the same tension as coarse mesh — over-tension a 305 and it tears at the frame. High-count screens commonly run a few N/cm lower. Chasing 25 N/cm on a delicate 305 is how screens die young.
- Consistency beats the absolute number. A full set of screens at a matched 19 N/cm prints better registration than a mixed set of 24 and 16. When a job has four colors, measure all four screens and worry about the spread before the average.
“My Prints Are Off” — Six Symptoms That Are Actually Low Tension
Before you touch ink viscosity, squeegee pressure, or press leveling, check tension if you see:
- Sawtoothing / jagged edges on lines that run diagonal to the mesh threads — the classic low-tension signature (and yes, we wrote a whole guide to sawtoothing; tension is the cause nobody checks first).
- Registration drifting mid-run, or different on the left and right sides of the print.
- Ghost shadows — a faint double image beside fine details, from the mesh releasing late.
- Uneven ink deposit — the same flood and stroke prints heavy in one area, thin in another.
- Ink sticking to the screen bottom or a wet, slapping sound at peel-off — snap-off is too slow.
- Blurred halftone dots on a screen that used to print them cleanly.
Any one of these on a screen reading under 15 N/cm is your answer. Stop tuning the press.
Choosing a Tension Meter
The market splits into two families:
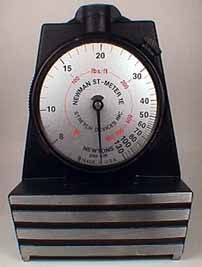
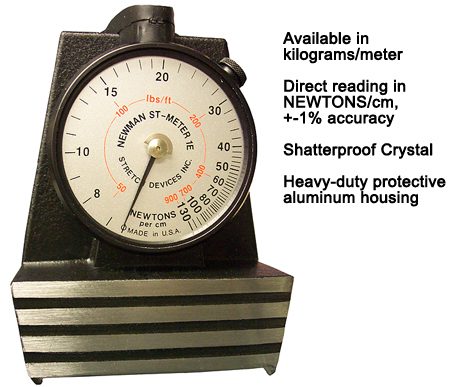
- Mechanical (dial) meters — the shop standard for decades. Roughly $150–250. No batteries, survives being knocked off a bench, and the good ones hold calibration for a year or more. The dial takes a moment to learn to read.
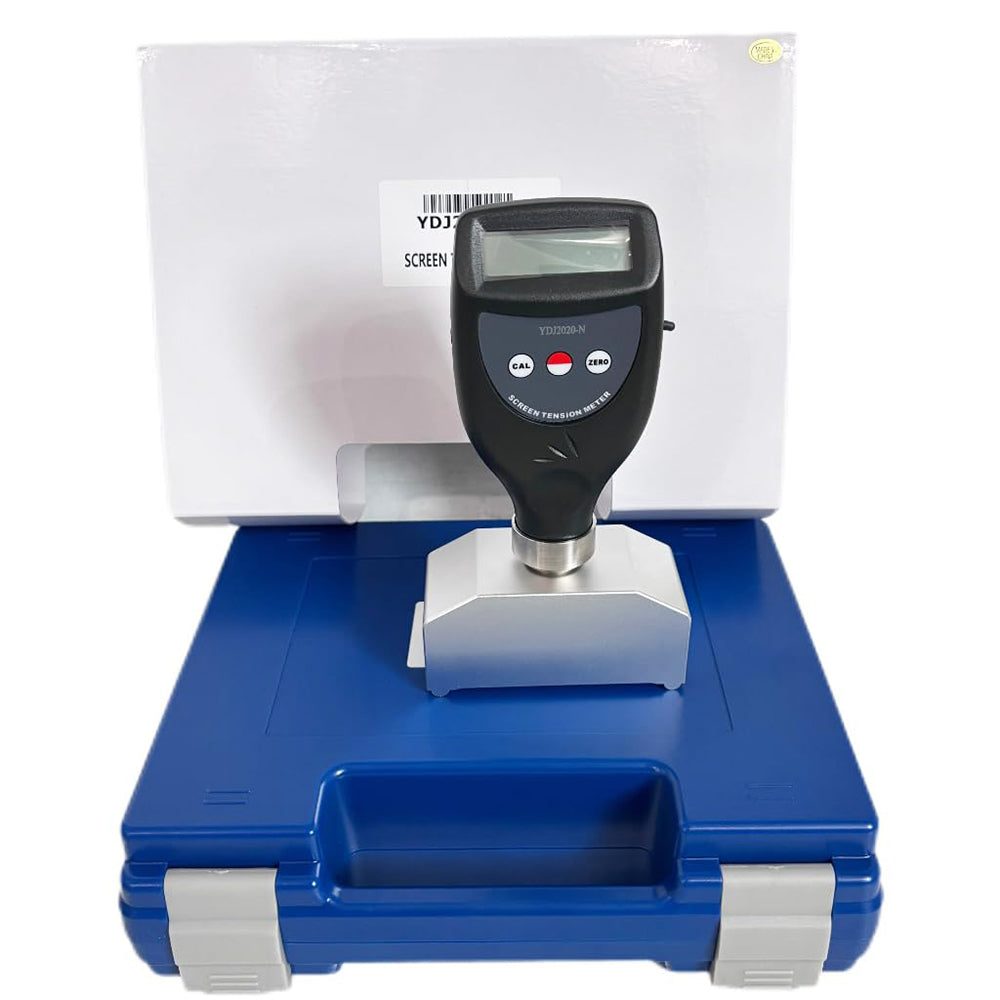
- Digital meters — roughly $300–600. Instant unambiguous readout, data hold, easier on new operators, some store readings. More to break, and they want periodic calibration just the same.
Either family works. What actually separates a good buy:
- It ships with a calibration glass (or plate), and the manufacturer supports recalibration. A tension meter is only as good as its last calibration — plan on checking it monthly against the glass and having it professionally recalibrated yearly, same as a durometer gauge.
- Range covers roughly 5–50 N/cm. Garment work lives at 15–30, but you’ll want headroom if you ever measure coarse industrial mesh.
- Buy once. This is a ten-year tool. The no-name $60 meters are tempting; the savings evaporate the first time you chase a “press problem” that was really a meter reading fiction.
Can You Get By Without One?
For a hobby setup printing one-color bold designs on weekends — honestly, yes, for a while. The traditional field tests exist: the “thumb press” feel test, the tap-and-listen test (a tight screen rings at a noticeably higher pitch). Experienced printers develop calibrated thumbs.
But be honest about what those tests are: comparisons against a feel you only have after years of printing. They can’t tell you whether this screen is at 19 or 14 N/cm, they can’t keep a set of four screens matched, and they definitely can’t tell you when the decline started. The day you take a multi-color order, or the day a print comes out soft and you can’t say why — that’s the day the meter pays for itself. Most shops meet that day within their first year.
FAQ
What should screen tension be for screen printing? Around 25 N/cm for a freshly stretched screen is the common target in garment printing. The working range is roughly 20–25 N/cm; below 15 N/cm expect print defects, and below 10 N/cm the screen needs re-stretching or retiring. Fine mesh (230+) runs a few N/cm lower to protect the thinner threads.
Where do you measure screen tension? Nine points: center, plus points 3–4 inches in from each corner and each edge midpoint, with the screen lying flat. Tension varies across the frame — one reading, especially a center reading, can hide a soft corner that wrecks registration on one side of the print.
How often should you check screen tension? Three moments: when a screen is newly stretched or delivered, before any multi-color job, and monthly for screens in regular use. Write the readings and date on the frame — the trend over time is more useful than any single number.
Why is my screen printing blurry even with a new screen? New mesh doesn’t guarantee correct tension — under-stretched new screens are common, especially budget pre-stretched ones. Check the actual number: below about 15 N/cm, snap-off slows and you get blur, ghosting, and sawtooth edges regardless of how new the screen is.
How long does a screen hold its tension? Expect the fastest drop in the first days after stretching (which is why many shops rest a freshly stretched screen 24 hours and re-check before coating), then a slow decline over months of use. A working screen commonly stays in the printable range for 6–18 months depending on use, chemicals, and how hard it was stretched initially.
Does mesh count affect how tight a screen should be? Yes. Fine meshes are woven from thinner thread and can’t safely hold coarse-mesh tensions. Chasing a single number across all your screens over-tensions the fine ones. Match tension within a job’s screen set (spread ≤2 N/cm) before chasing any absolute target.